
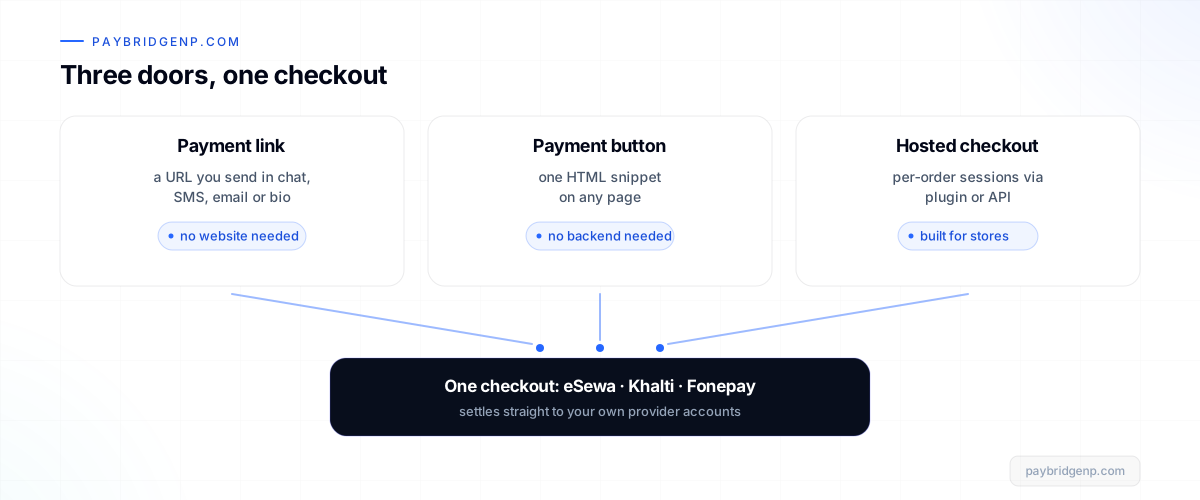
Every online payment in Nepal ends the same way: the customer picks eSewa, Khalti or Fonepay and confirms. What differs is the door they walk through to get there, and picking the wrong door costs you real money, either as lost sales from a clumsy flow or as weeks of developer time you did not need to spend.
There are three doors, and most businesses only need one. Here is how to pick.
At a glance
| Payment link | Payment button | Hosted checkout | |
|---|---|---|---|
| Setup time | Under a minute | A few minutes | Minutes with a plugin (Shopify: our team sets you up), hours with the API |
| Code needed | None | One HTML snippet | Plugin install or API call |
| Where it lives | Chat, SMS, email, bio | Any HTML page | Your store's checkout flow |
| Amount | Fixed or set per link | Set per button | Set per order, automatically |
| Best for | Social sellers, invoices, fees | Landing pages, events, donations | E-commerce stores, apps |
| Order tracking | Per link | Per button | Full, per order |
All three run on the same rails underneath: the customer sees the same trusted checkout with every provider you have enabled, and the money settles to your own provider accounts. PayBridgeNP never holds it.
Payment links: selling where the conversation is
A payment link is a URL. You create it in the dashboard (or via API), set the amount and description, and send it wherever your customer already is: Messenger, Instagram DM, WhatsApp, Viber, SMS, email.
This is the door for business that happens in chat, which in Nepal is a lot of business. Instagram sellers confirming an order, a consultant invoicing a client, a school collecting a fee, a landlord collecting rent. No website required at all.
Choose links when the sale is agreed person-to-person and you just need a clean, trusted way to collect. Skip them when you have a catalogue and volume; clicking "create link" thirty times a day is a sign you want a store checkout instead.
Payment buttons: one snippet on any page
A payment button is an embeddable widget. You configure the amount, label and colours in the dashboard, copy one HTML snippet, and paste it into any page you control: a portfolio site, an event page, a donation page, a course landing page.
The button needs no backend and no API key on the page. The button ID is a safe public token; your secret key never leaves the server side. Click it, and the customer goes through the same checkout with every provider enabled.
Choose buttons when you have a page but not a platform: a static site, a WordPress page without WooCommerce, a Linktree-style setup. Skip them when amounts change per customer or per cart; that is what checkout sessions are for.
Hosted checkout: the full store flow
Hosted checkout is the door for real stores. Your site or app creates a checkout session for the exact order amount, the customer lands on a payment page with every provider you accept, pays, and comes back to your success page while a signed webhook confirms the payment to your server.
You get this without code through the Shopify, WooCommerce and WHMCS integrations, or in a few lines through the API and SDKs. Either way you inherit the parts that are annoying to build: provider redirects, QR display, verification, retries, refund tracking, reconciliation.
Choose hosted checkout when orders have carts, amounts vary, or your system needs to know reliably which order was paid. Skip it when you sell three fixed things a week through DMs; links will do.
Five questions that settle it
- Do you have a website? No: payment links. Yes, keep going.
- Is it a store with a cart? Yes: hosted checkout, via plugin if your platform has one. No, keep going.
- Are amounts fixed? Yes: payment buttons on the page. No: hosted checkout via API.
- Where do customers decide to buy? In chat: links, even if you also have a site. On the page: buttons or checkout.
- Do you need per-order reconciliation? Yes: hosted checkout, no exceptions. It is the only door built for it.
Mixing doors is normal, and the doors share one dashboard. Plenty of merchants run hosted checkout on the store, a button on a landing page, and links in DMs, with every payment landing in the same place.
The conversion angle
Whichever door you pick, the same things move the numbers:
- Provider choice. A buyer who wants Fonepay QR abandons an eSewa-only checkout. Enabling all three providers is the single cheapest conversion win in Nepali e-commerce.
- Fewer steps. A link that opens straight into checkout beats a link to a page with another button on it.
- Trust. Nepali buyers look for a familiar, branded payment page before typing anything. A consistent hosted checkout reads safer than a homemade form, and no card data or PCI scope ever touches your site.
Frequently asked questions
Which is fastest to start with? A payment link. Sign up, create a link in the dashboard, send it. There is a free plan, so the whole experiment costs nothing.
Can the same account use all three? Yes. Links, buttons and hosted checkout are all included and share the same providers, dashboard and settlement setup.
Do customers pay differently between the doors? No. All three end in the same checkout with the same providers. Only the entry point differs.
Which one do Shopify or WooCommerce stores use?
Hosted checkout. WooCommerce stores install the plugin themselves and are up in minutes, never writing code. Shopify works through custom distribution: you email your .myshopify.com domain, the PayBridgeNP team sets your store up (usually the same day), and customers pay through a payment link after placing their order.
Can I take partial or varying amounts? Links can be created per invoice with any amount. For amounts computed at purchase time (carts, quantities), use checkout sessions through the API or a plugin.
Next Steps
- Try the fastest door: create a payment link from the dashboard.
- Have a page? Set up a payment button in a few minutes.
- Running a store? Start with hosted checkout or the integrations.
- Start free in the PayBridgeNP dashboard.